You don't need a piping bag license to make Halloween cookies people photograph before they eat. A little orange food coloring and a toothpick genuinely does 80% of the work.
Part of the Halloween party planning guide — pair a tray of these with the Halloween party games list for a genuinely easy dessert-and-activity combo, since decorating the cookies can double as an activity for kids at the party.
Heads up: some links in this post are Amazon affiliate links — if you buy through them, Eventic earns a small commission at no extra cost to you.
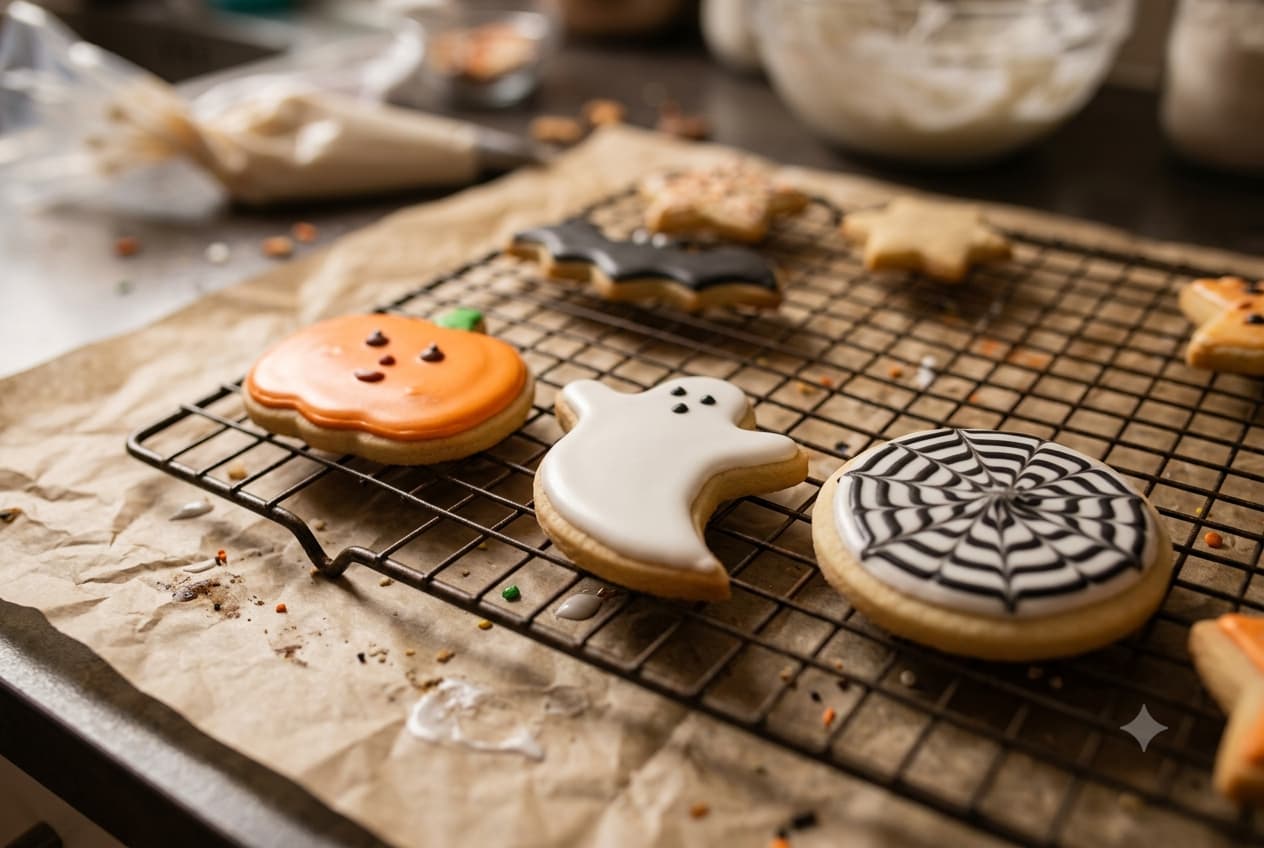
Spider web cookies (the showstopper, minimal skill)
The one everyone thinks took longer than it did.
- Bake a basic round sugar cookie and let it cool completely.
- Flood the top with white icing, let it set for about a minute (not fully dry).
- Pipe thin concentric circles of black icing on top.
- Drag a toothpick from the center outward in straight lines, evenly spaced — this pulls the black into a web pattern.
- Let it dry flat, undisturbed, for at least an hour.
A cheap set of decorating tips and a couple of squeeze bottles makes this dramatically easier than trying to freehand it with a spoon — worth the $10 if you're doing more than a dozen.
Ghost cookies (zero piping required)
Genuinely the easiest one on this list.
- Use any round or drop cookie base — even store-bought works here.
- Melt white chocolate or white candy melts.
- Dip the cookie top in the melted chocolate, letting excess drip off.
- While it's still wet, place two small chocolate chips (pointy side down) for eyes.
- Let set on parchment paper.
No icing bag, no piping skill, no fine motor coordination required. This is the one to hand to a kid who wants to "help."
Pumpkin patch cookies
- Tint your basic cookie dough orange using gel food coloring (gel gives a more solid color than liquid drops — a basic gel food coloring set covers orange, black, and green in one kit).
- Roll into small balls, then use kitchen twine wrapped around each ball before baking to create pumpkin-ridge indentations — remove the twine right after baking while the cookie's still warm.
- Add a small piece of pretzel stick as the "stem" while warm.
- Once cool, a dot of green icing for a curled vine finishes the look.
Mummy cookies
- Any rectangular or round cookie base.
- Pipe white icing back and forth in uneven strips, leaving small gaps.
- Add two candy eyes peeking through a gap.
That's it. It looks intricate; it takes about ninety seconds per cookie once the icing's ready.
Black cat cookies
- Use a cat-shaped cutter (or a simple triangle-ear circle if you don't have one).
- Flood with black icing, let dry.
- Add small green icing dots for eyes and a thin pink line for a nose.
Tips that actually make a difference
- Chill the dough for at least 30 minutes before rolling — Halloween cookie cutters tend to have thin, detailed edges (bat wings, cat ears) that hold shape much better with firm, cold dough.
- Flood icing needs to be the right consistency — too thin and it runs off the edge, too thick and it won't self-level. Test on one cookie first before committing to the whole batch.
- Work in batches by color. Do all the white icing work across every cookie first, let it set, then move to black details — trying to finish one cookie completely before starting the next slows everything down.
- Let kids do the ghost cookies. Genuinely, dipping and adding two chocolate chips is foolproof enough to hand off, and it frees you up to finish the fussier spider webs.
I once tried to freehand a spider web with a spoon because I couldn't find a piping bag, and it looked like a toddler's first art project. The toothpick-drag method exists because someone smarter than me figured out you don't need steady hands, you need one specific trick.
Whatever you make, put it out early — Halloween cookies disappear faster than almost anything else on the table, decorated or not.
People Also Asked
Explore common questions related to this blog.
Yes — undecorated cookies keep in an airtight container for up to a week; fully decorated ones are best within 2–3 days so the icing stays crisp.
Store-bought sugar cookies work fine as a base for the ghost and spider web designs — the decorating is what makes them look homemade anyway.